Module 4 - Incident Management
This module assumes that you have completed Module 1, as the data and the artifacts that we will be using in this module need to be deployed to your Microsoft Sentinel instance.
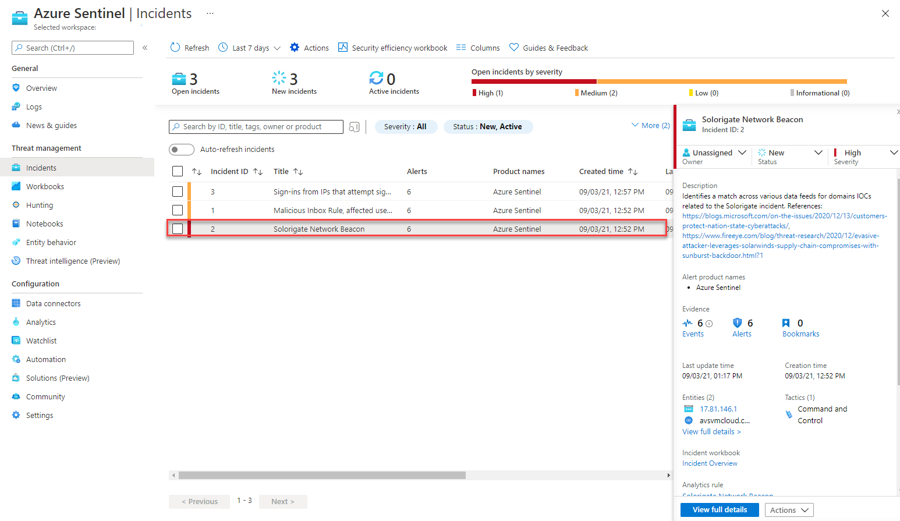
As a SOC Analyst, your entry point to work on Security incidents (i.e. tickets/jobs/cases) in Sentinel is the Incidents page.
From the Sentinel workspace, click Incidents to open the incidents page. This page will show all the open incidents in the last 24 hours by default (configurable).
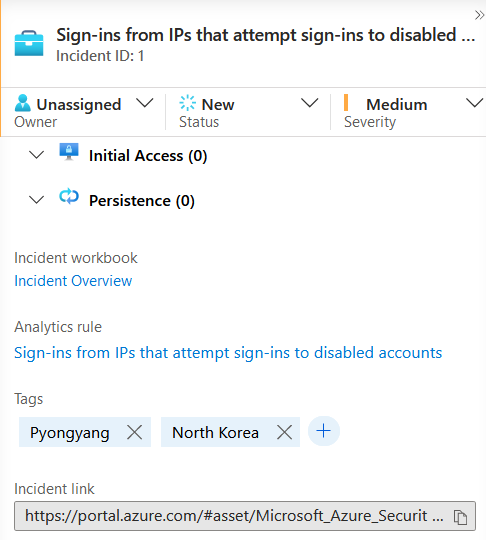
Find and click the incident titled Sign-ins from IPs that attempt sign-ins to disabled accounts. In the right-hand pane you can see the incident preview with high-level information shown.
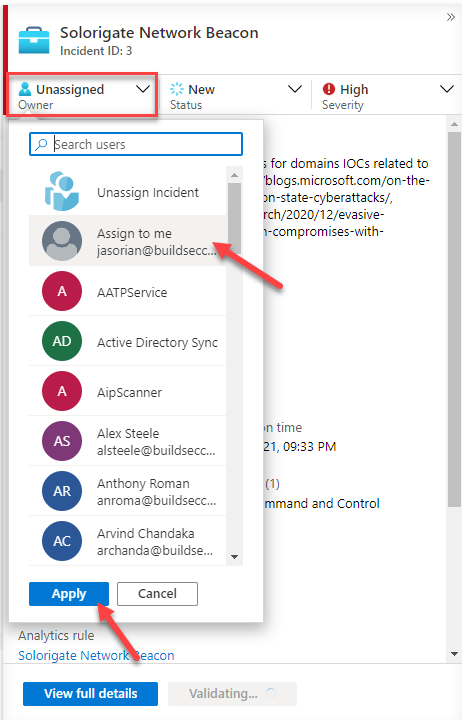
As you are the SME SOC analyst investigating incidents, you need to take ownership of this incident. In the right pane, change the Owner from Unassigned to Assign to me, and click Apply.
Another way to review incidents - and also to get a high-level view on general SOC health - is through the Security efficiency workbook. We have 2 options to open this workbook:
Through the link in the top action bar in the Incidents page - this will open the workbook's general view, where we see overall statistics for incidents:
Through the link in the incident, which opens the same workbook to a different tab, presenting the information and lifecycle for the selected incident.
Review the workbook views.
Exercise 2: Handling the incident "Sign-ins from IPs that attempt sign-ins to disabled accounts"
We're going to walk through an example incident handling procedure, demonstrating a few things a SOC analyst might accomplish using Sentinel.
Initial incident handling
Open your Sentinel instance.
Navigate to the Incidents page.
Locate the incident "Sign-ins from IPs that attempt sign-ins to disabled accounts".
Click the incident and look at the preview pane (on the right). Note that Sentinel displays entities surfaced by this incident here.
Take ownership of the incident and change its status to Active (don't forget to press Apply after each step.)
Click View full details in the preview pane.
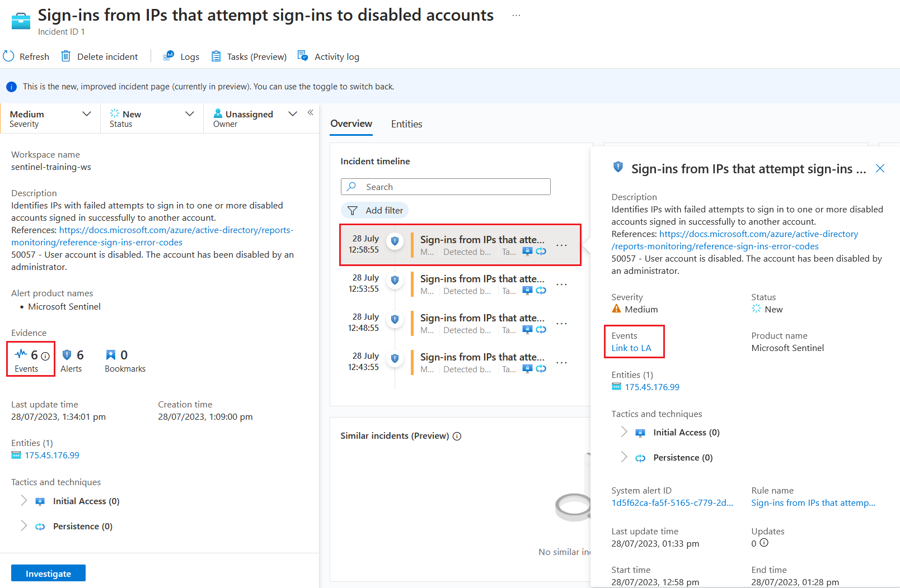
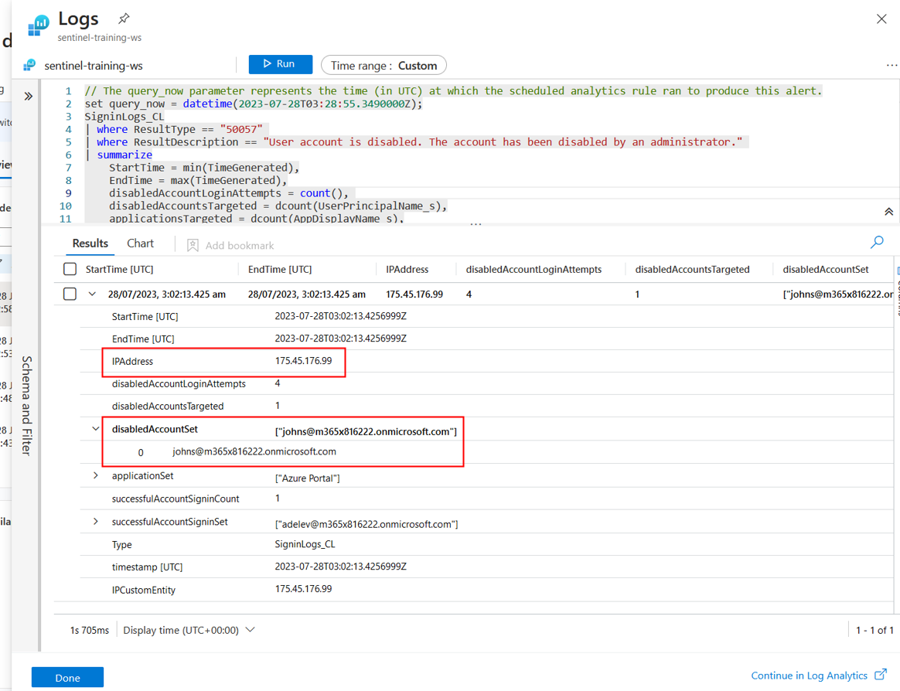
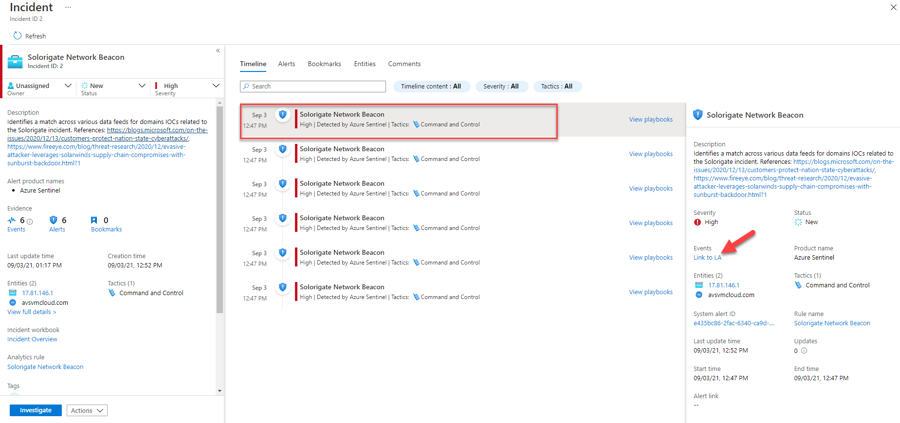
In the left-hand pane, the number of Events may not be directly clickable if multiple Alerts are consolidated. However, you can see the raw Events for each Alert by clicking on that Alert in the Incident Timeline, and then clicking Link to LA. This pops open the Logs pane, which allows you to investigate the evidence without navigating away from the Incident.
To get more context for this IP address, we want to add Geographic IP information - one type of incident enrichment. In a real SOC, this operation would typically be set to run automatically, but for this lab, we want you to run it manually.
Close the Logs panel to go back to the full Incident page
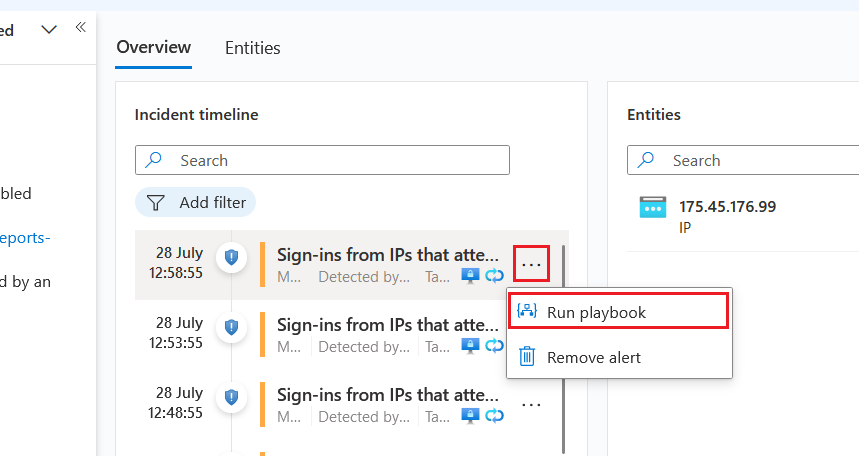
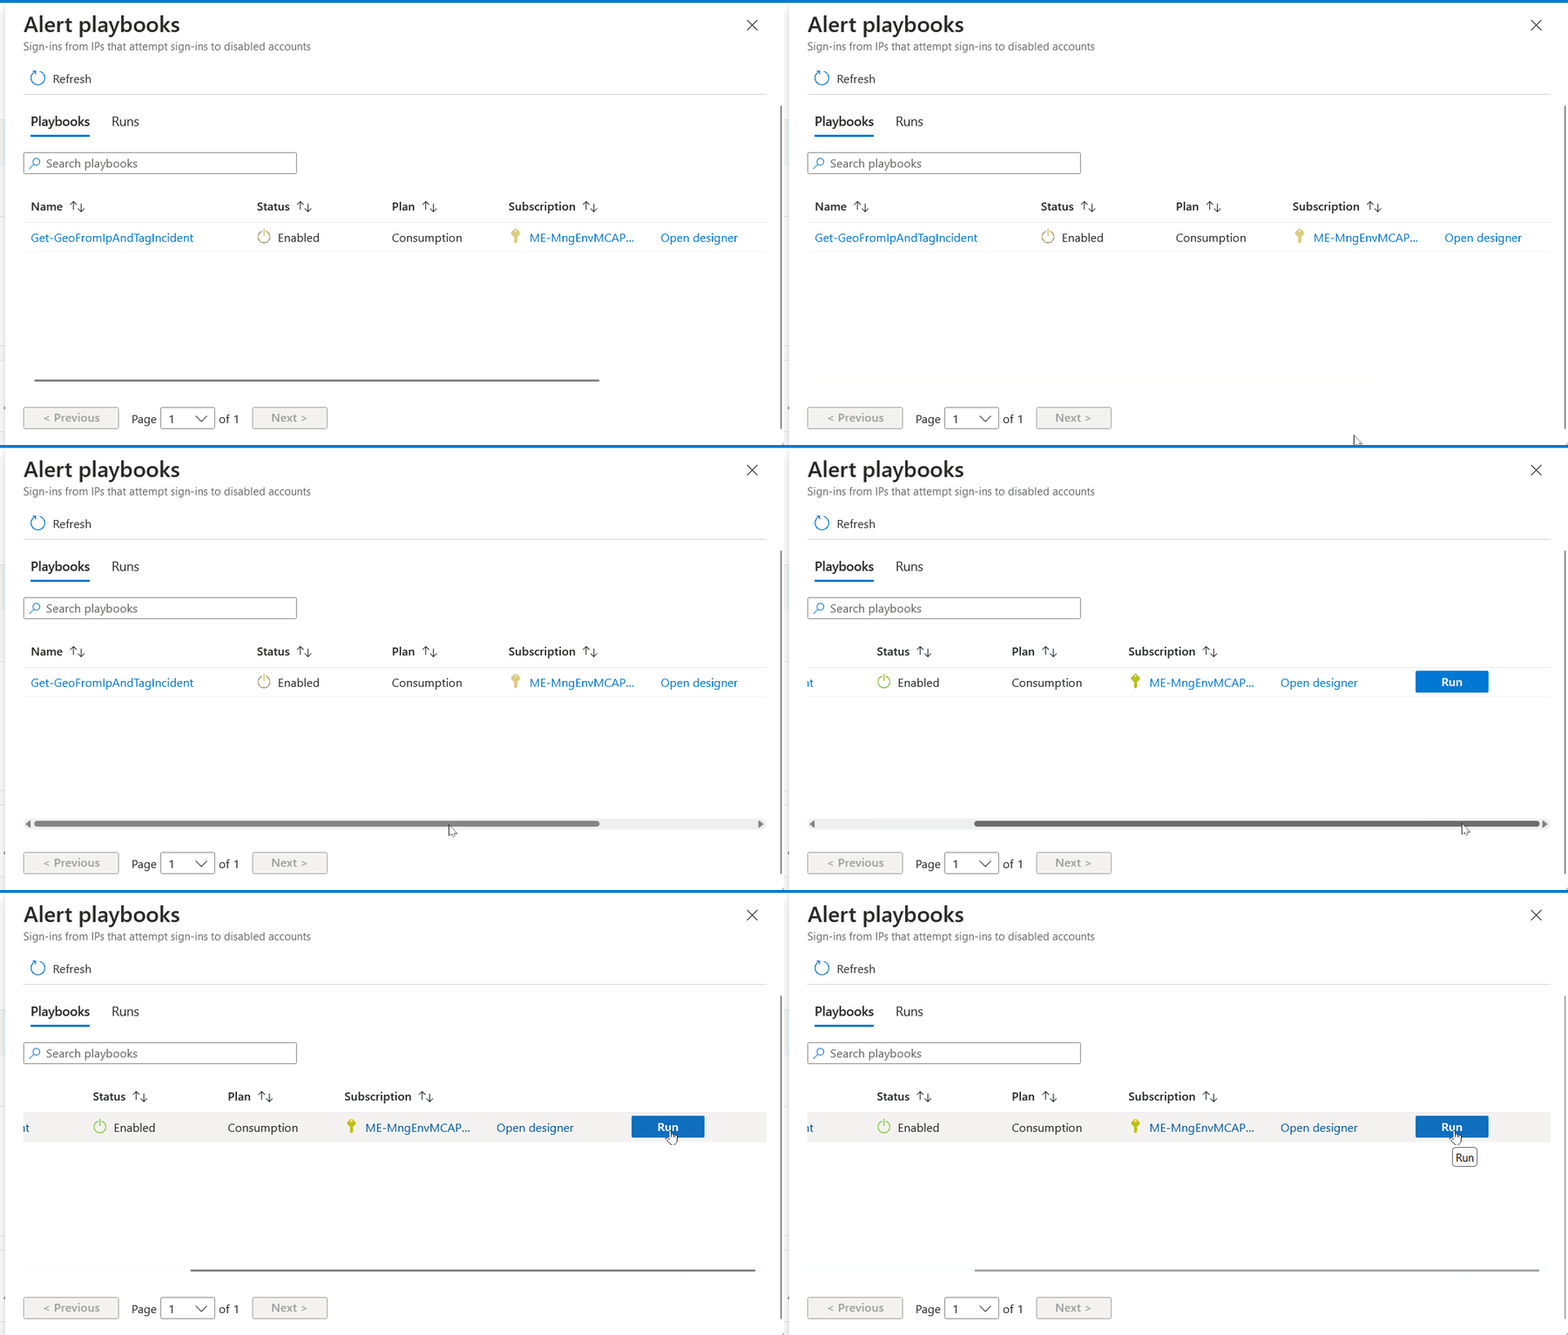
Click Run playbook
It should take only a few moments to run, if successful.
Note: Sentinel provides automatic geo-IP lookup when viewing IP entities, but these are not recorded with the entity or detection, so using a Playbook to capture current 3rd-party geolocation information in an incident tag or comment can still be useful.
Continuing the investigation with a Workbook
As the SOC Analyst, this enrichment information increases your concern! You want to check for other traces of this IP in your network. For this investigation you want to use the Investigation Insights workbook. (The training lab has saved a copy to your workspace already.)
Click the Investigation Insights - (date) saved Workbook, then in the right pane, press View saved workbook
Check that in the properties selector at the top that the Subscription selector is set to the subscription that hosts your Sentinel Lab, and also that the workspace selector is set to your lab workspace's name (e.g. sentinel-training-ws).
if not, you can set these properties and hit the Save icon so they're remembered for next time.
As the subject of our investigation is the suspicious IP address from North Korea, we want to see all the activity related to that IP. So, in the properties selector, switch investigate by to Entity. This should (near-)instantly switch the Workbook to the Entity Insights view.
Scrolling down, under Activity Detail we can see many successful logins from this IP from the user Adele, and also some failed logins to disabled accounts from the last few day/hours.
We copy the user ID [email protected] and validate it in our internal HR system, and from the information we collect it seems that Adele is part of the Security Red Team, and this suspicious behaviour is part of an exercise they are running for 48 hours.
Note: If this were a real account, we could also more thoroughly investigate the account on the Investigate Account tab of this workbook, or (even more easily) through the account Entity page in Sentinel - but this training data set doesn't allow for that. For Microsoft Entra ID (AAD) identities mapped to an Account entity, directory information is provided as part of the Entity view, which can include job title, location, manager, group membership and other useful information.
As the Red Team exercise was discovered by us, the SOC Manager asks us to kindly allow-list this IP for this detection type, so that we don't spend time investigating incidents from it while the test runs. Rather than edit the rule definition itself, we'll use an incident Automation Rule for this.
Exercise 3: Handling the incident "Solorigate Network Beacon"
Navigate to the Incidents view of your Sentinel instance.
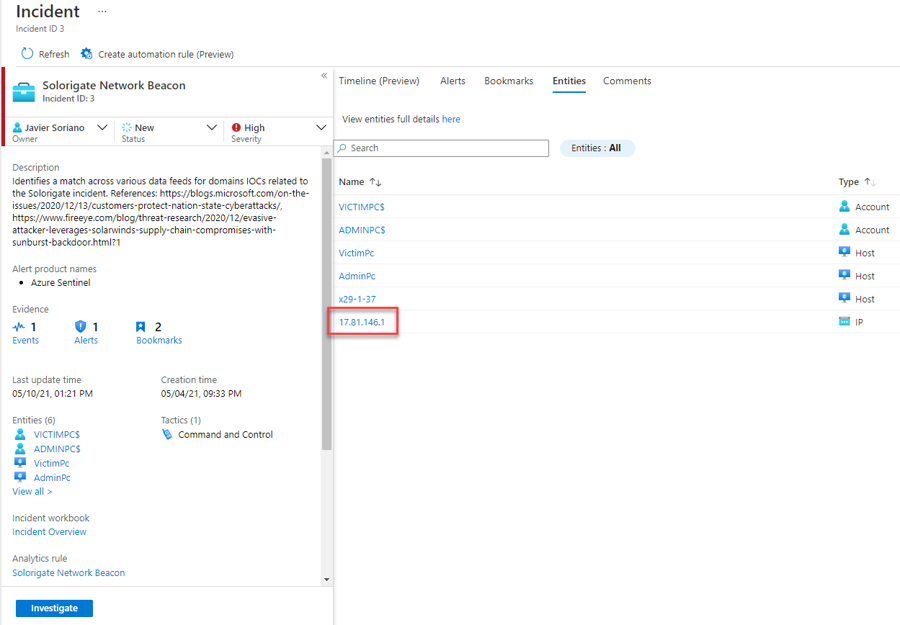
Read the description of the incident. As you can see, one of the domain IOCs related to Solorigate attack has been found. In this case, domain avsvmcloud.com is involved.
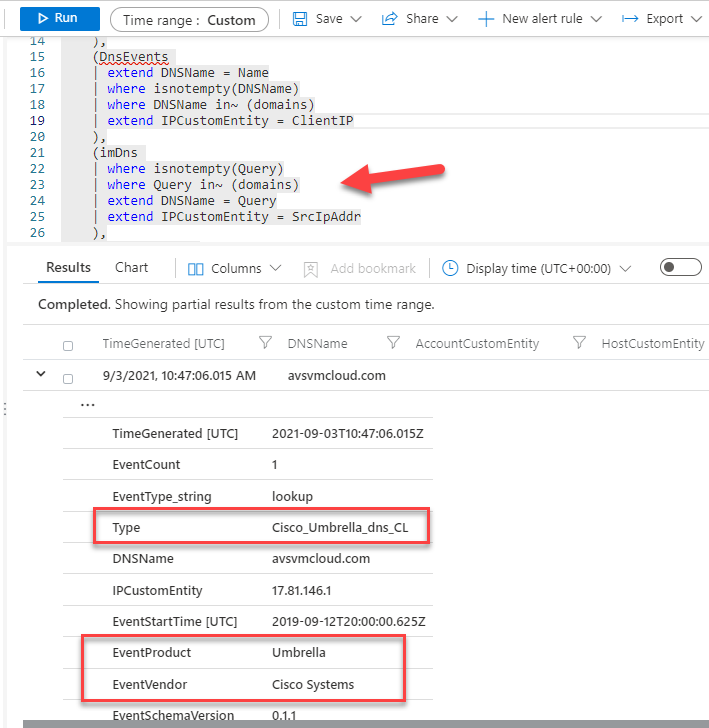
As you can see, the events originated in Cisco Umbrella DNS, and the analytic rule uses Advanced Security Information Model (ASIM) to normalize these events from any DNS source. Read more about ASIM and the DNS schema.
Hunting for more evidence
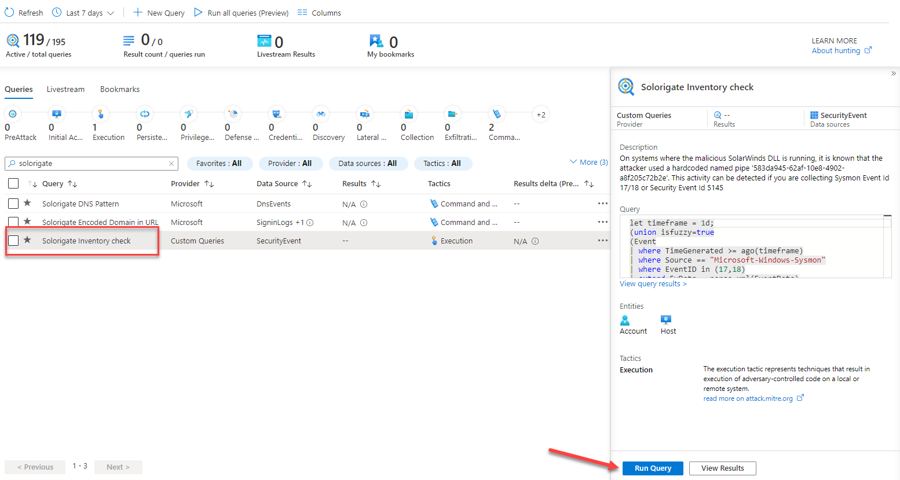
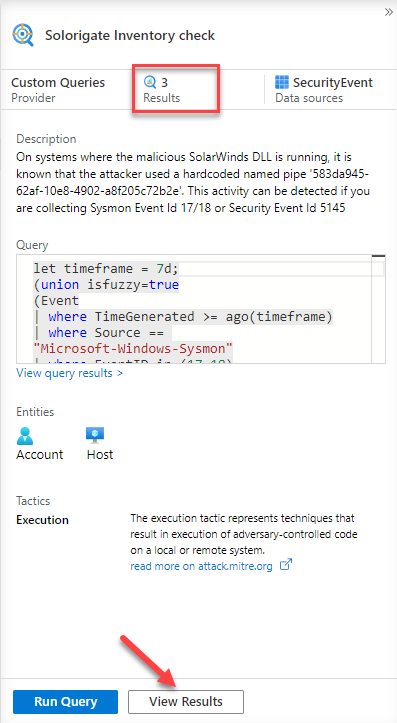
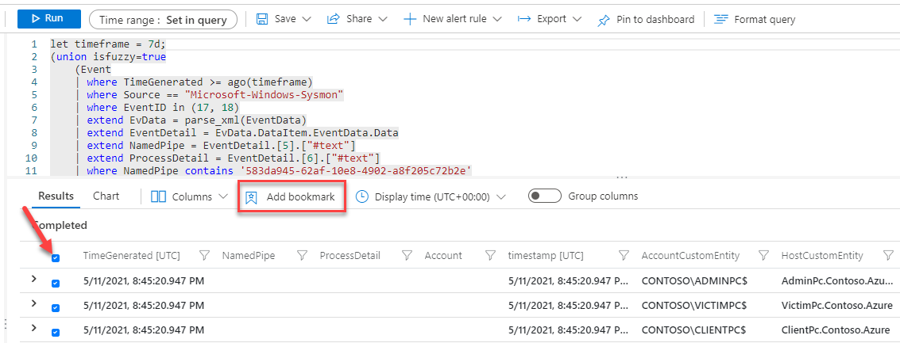
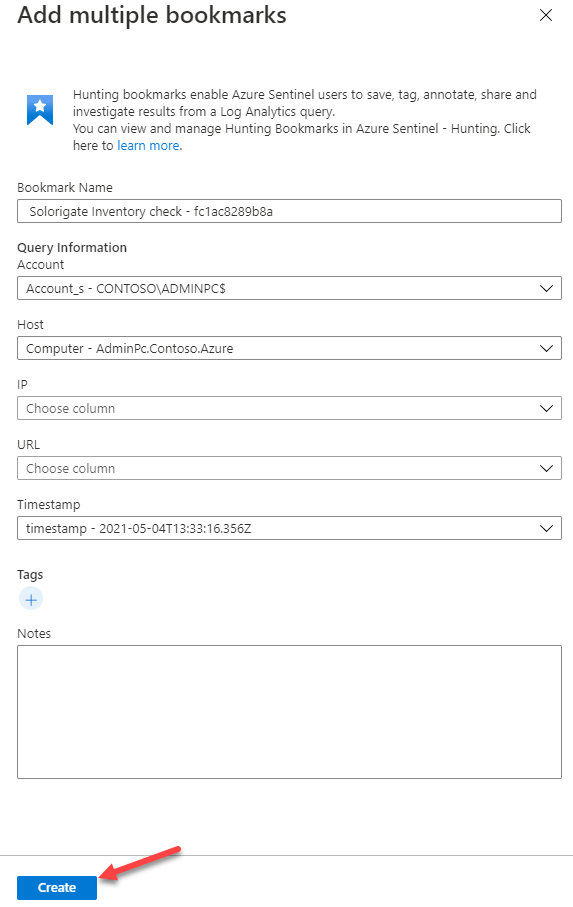
As your next step, you would like to identify the hosts that might have been compromised. As part of your research, you find the following guidance from Microsoft. In this article, you can find a query that runs a SolarWinds inventory check. We will use this query to find any other affected hosts.
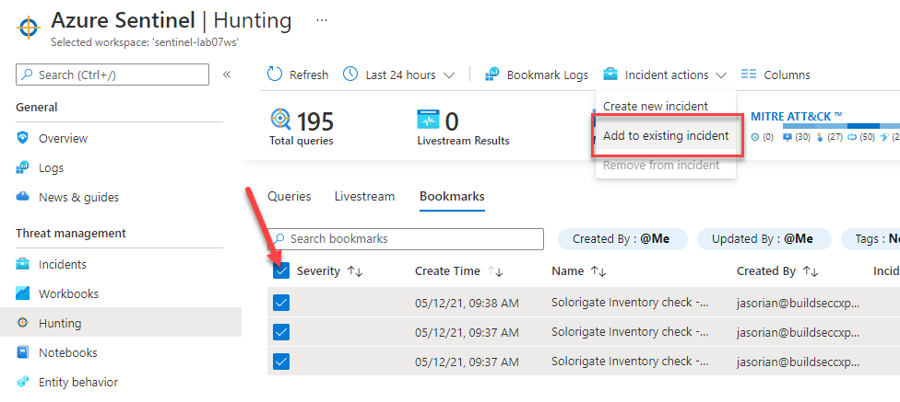
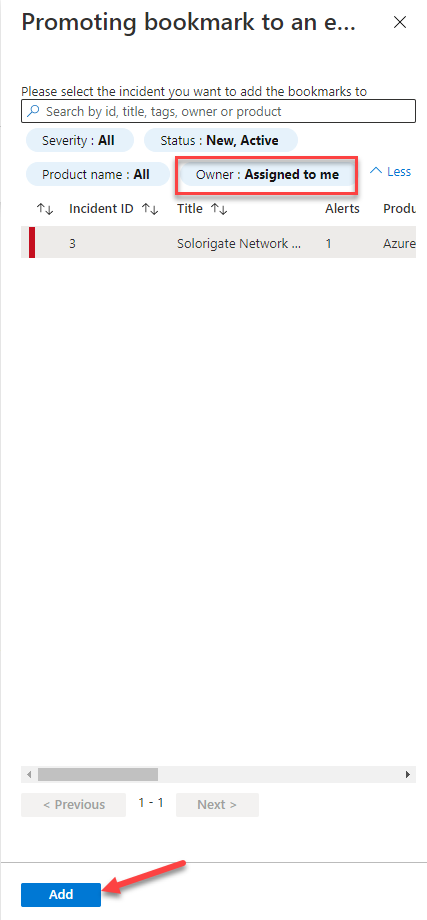
Wait until the operation finishes, then close the log search using the ✖ at the top right corner. This will land you in the Bookmarks tab inside the Hunting menu (navigate there if not), where you should see your two new bookmarks created. Select both of them and click on Incident actions at the top and then Add to existing incident.
At this point you can ask the Operations team to isolate the hosts affected by this incident. Note: In a real SOC, this step could potentially be automated using a Playbook.
Add the IP to Threat Intelligence IOCs
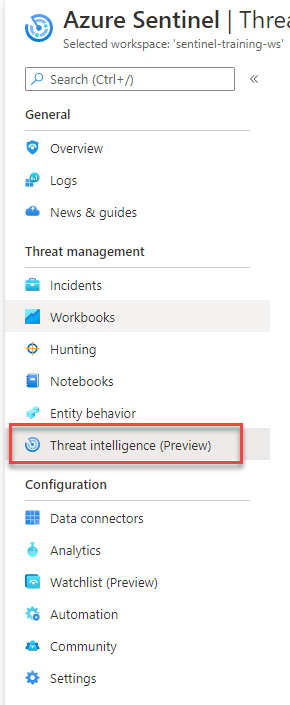
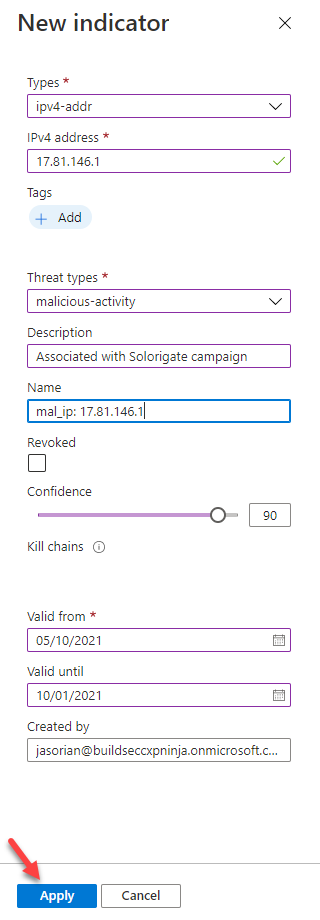
Now, we will add the IP address related to the incident to our list of Indicators of Compromise (IOC) in our Sentinel workspace Threat Intelligence store, so we can capture any new occurrences of this IOC across our logs.
Go back to the Incidents view.
Hand over the incident
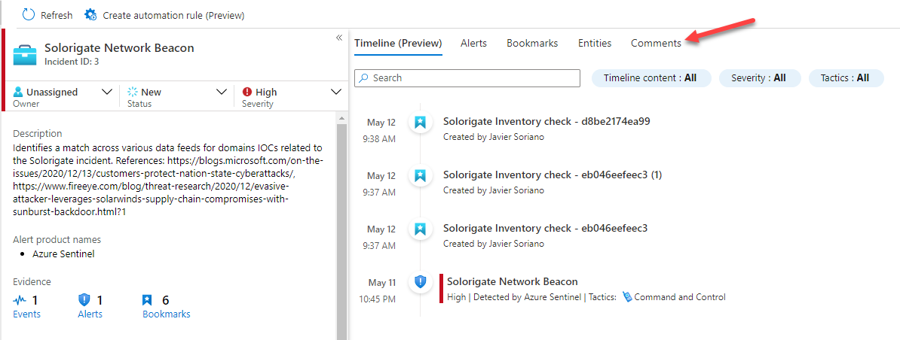
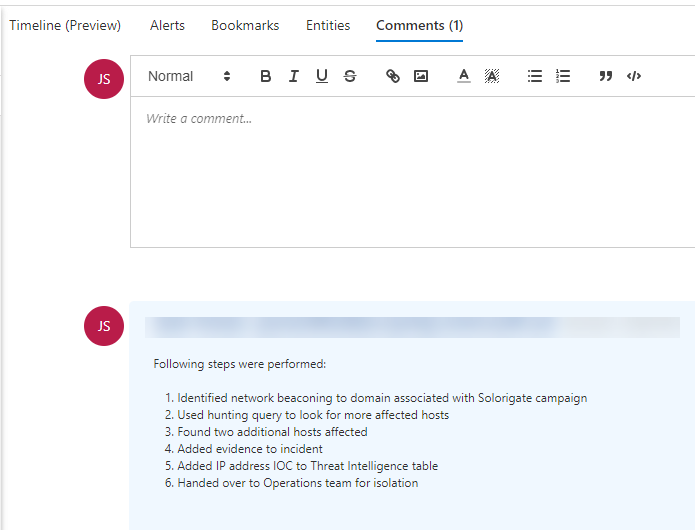
We will now prepare the incident for handover to another team (maybe Operations or Forensics) by ensuring what we've done is documented.
Go to Incidents and select the Solorigate incident assigned to you. Click on View full details.
At this point you would hand over the incident to the appropriate team. You could:
copy the link directly from the bottom of the incident preview if communicating out-of-band
or assign the incident directly to the person or team alias
Congratulations, you have completed Module 4!.
Last updated


